Portable Audio Recording Kit Zoom H5
Record your own history with Zoom H5.
For ages 16+
RESERVE HERE
Before you start
- SD card: Make sure you have an SD card is compatible with the Zoom H5 recorder.
- Check headphones: Connect the included headphones to the Zoom H5 to monitor audio.
- Check power source: Ensure the recorder is fully charged, or that you have a power source to plug the recorder into, or you have enough batteries. Battery life varies based on usage, but a full charge can average up to 10 hours of continuous recording.
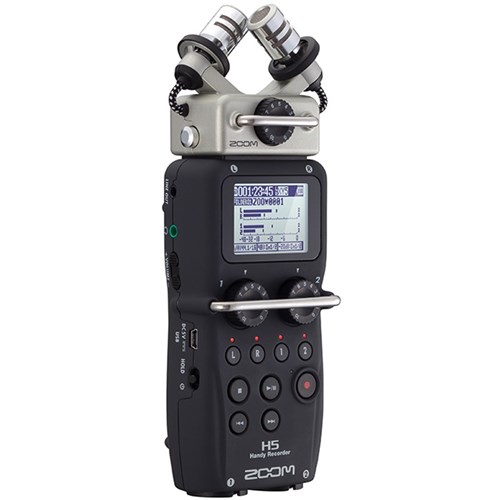
- Get to know the various functions and buttons: Use the diagrams below to find all the parts of your Zoom H5 recorder.
How to set up and use
Zoom H5 Recorder Power:
- If you are using mains power, simply connect the supplied cable to the recorder, then plug the adapter into a
power outlet.
- If you are using batteries, turn the recorder power off, then remove battery cover, insert batteries (x2 AA)
and then replace the cover.
Insert an SD Card:
The card slot is on the righthand side of the device.
- Make sure the recorder is OFF.
- Open the door on the side labeled SD.
- Looking at the front of the recorder, insert the card face up until it clicks.
Turn on:
Slide the power/hold button down and hold until the display comes on.
Set recording mode:
In most cases, you’ll want to select Stereo File this will allow you to record all the inputs together (if you want each input recorded separately, select ‘multifile’).
Navigate using the Scroll button which can also be pushed in to select menu options.
Select the input:
Select whether to use the L/R inputs and Inputs 1/2.
- L/R inputs are for if you are using the inbuilt microphones
- 1/2 are if you are using an external mic input
NOTE: In Multifile mode, the L/R inputs will be recorded to the L/R tracks and Inputs 1/2 will be recorded to tracks 1 and 2.
Recording:
Press the record button once to go into preview mode. Here you can see the levels on the screen and the red light will start blinking.
Listen through the headphones to ensure the audio sounds clean and at a good level.
When you’re sure everything is set up correctly press the record button a second time.
You are recording when the timecode numbers on the ZOOM H5 display are counting up.
Setting audio levels:
Adjust the levels with the input volume wheels on the front. Unless you are connect an external microphone (not included in this kit) ensure buttons L and R are selected. These correspond to the Left and Right volume wheels.
Stop and pause recording:
To stop recording press the red button.
Every time you press the red button to stop recording a new file will be created.
To pause recording instead select the Play/Pause button.
Playback and file management:
- You can use the playback buttons to listen to files.
- To delete files: Navigate to a file with the menu.
- Press the Delete button. Confirm with the Record button.
- To Format (wipe) the entire card: dold the Delete button while turning the recorder on. Confirm with the Record button.
Transferring your recordings
- The Zoom H5 records to a SD card.
- It is preferable to transfer files via a USB cable. Connect the USB cable to a laptop or a computer.
- Power on the Zoom H5.
- The display provides two options. Audio I/F to record and Card Reader which treats the Zoom H5 like a USB.
- If there is an arrow pointing to Audio I/F use the Limiter button under the down arrow to move the arrow down to point to the Card Reader option.
- Select this option by pressing the red button. On your computer, you will now see the Zoom device as one of the drive options.
- Navigate to the STUDIO folder.
- Drag files directly from the disc image to a space on your computer.
Troubleshooting and support
You can view the Zoom H5 Recorder's manual for in-depth operation instructions and more advanced features here.
Before returning
Please ensure all parts and returned in good condition with the set.
Make sure you have removed your SD card and batteries when returning.
This item MUST BE returned to the library desk during branch opening hours.
Donate and share
We’d love to hear your recordings! Tag us on Instagram and Facebook @hobsonsbaylibraries #libraryofthings.
Consider donating a recording to our Heritage Collection.